说明:springboot程序启动时默认加载application.yml文件
#语法 : 1.key-value结构之间使用:(空格)进行分割 # 2.yml配置文件有层级结构 server: port: 8090 servlet: context-path: / #项目发布的路径信息 默认条件下 / 根路径 #tomcat服务器进行发布 默认发布路径为webapps目录下 # / ROOT 项目根路径 # / jt JT项目路径 ## 1.2为属性赋值 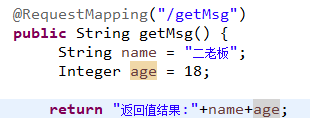 ###1.2.1为什么要为属性赋值 说明,通过途中发现,用户的数据如果被写死,后续需要修改代码时会很不方便 解决方案:利用配置文件动态为属性赋值 ###1.2.2利用@Value注解为属性赋值 ###1.2.2.1编辑YML配置文件 ```java #配置用户配置文件信息 msg: username:二老板 age:18###1.2.2.2利用注解取值
public class getMsgcontroller { @Value("${msg.username}") private String name; @Value("${msg.age}") private Integer age; @RequestMapping("/getMsg") public String getMsg() { System.out.println("11111"); return "springboot测试类"+name+age; } }###1.2.3 ###1.2.3.1需求说明 由于springboot整合第三方框架是,可能会遇到多个属性赋值的问题,如果通过@Value的方式赋值,则代码比较繁琐,能否优化????? ###1.2.3.2导入jar包
<!--添加属性注入依赖 --> <dependency> <groupId>org.springframework.boot</groupId> <artifactId>spring-boot-configuration-processor</artifactId> <optional>true</optional> </dependency>###1.2.3.3实现属性赋值
#key=value #pro文件都是字符串信息,所以不需要添加""号 msg.username=奥特曼 msg.age=18 package com.example.demo.controller; import org.springframework.beans.factory.annotation.Value; import org.springframework.boot.context.properties.ConfigurationProperties; import org.springframework.context.annotation.Configuration; import org.springframework.web.bind.annotation.RequestMapping; import org.springframework.web.bind.annotation.RestController; import lombok.AllArgsConstructor; import lombok.Data; import lombok.NoArgsConstructor; import lombok.experimental.Accessors; @RestController @ConfigurationProperties(prefix = "msg") //@Data //@Accessors(chain = true) //开启链式加载结构 //@NoArgsConstructor //无参构造方法 //@AllArgsConstructor //全参构造方法 public class getMsgcontroller { private String username; private Integer age; // @Value("${msg.username}") // private String name; // @Value("${msg.age}") // private Integer age; public String getUsername() { return username; } public void setUsername(String username) { this.username = username; } public Integer getAge() { return age; } public void setAge(Integer age) { this.age = age; } @RequestMapping("/getMsg") public String getMsg() { System.out.println("11111"); return "springboot测试类"+username+age; } }###1.4热部署工具
<!--支持热部署 --> <dependency> <groupId>org.springframework.boot</groupId> <artifactId>spring-boot-devtools</artifactId> </dependency>##1.5YML配置环境切换 ###1.5.1需求说明 开发程序时,可能会在成产环境和测试环境下不停地切换,如果频繁的修改YML配置文件,则可能会导致错误 这是可以用YML中环境切换来解决 环境切换前提:环境配置中的内容必须是"一致的"
###1.5.2YML配置文件说明
#语法 : 1.key-value结构之间使用:(空格)进行分割 # 2.yml配置文件有层级结构 #指定默认的环境策略 spring: profiles: active: - prod --- #环境分割 spring: profiles: - prod server: port: 8090 servlet: context-path: / #项目发布的路径信息 默认条件下 / 根路径 #tomcat服务器进行发布 默认发布路径为webapps目录下 # / ROOT 项目根路径 # / #配置用户配置文件信息 msg: age: 18 username: 二老板 --- #表示配置文件环境的分割 spring: profiles: - test #语法 : 1.key-value结构之间使用:(空格)进行分割 # 2.yml配置文件有层级结构 server: port: 8080 servlet: context-path: / #项目发布的路径信息 默认条件下 / 根路径 #tomcat服务器进行发布 默认发布路径为webapps目录下 # / ROOT 项目根路径 # / #配置用户配置文件信息 msg: username: 二老板 age: 18###1.6引入lombok ###1.6.1引入lombok的jar包
<!--引入插件lombok 自动的set/get/构造方法插件 --> <dependency> <groupId>org.projectlombok</groupId> <artifactId>lombok</artifactId> </dependency>###1.6.2安装lombok ###1.6.3lombok案例
@RestController @ConfigurationProperties(prefix = "msg") @Data //@Accessors(chain = true) //开启链式加载结构 //@NoArgsConstructor //无参构造方法 //@AllArgsConstructor //全参构造方法 public class getMsgcontroller { private String username; private Integer age; // @Value("${msg.username}") // private String name; // @Value("${msg.age}") // private Integer age; @RequestMapping("/getMsg") public String getMsg() { System.out.println("11111"); return "springboot测试类"+username+age; } }#1.7知识小结 ##1.7.1配置文件写法 1.YML文件写法 层级关系 空格 连接用:号 注意缩进 2.properties文件本身都是字符串,不需要添加" "号,注意切换字符集编码iso-8859-1为utf-8
##1.7.2为属性赋值 目的:动态配置属性信息 方式: 1.@Value spel表达式 2.@ConfigurationProperties(prefix = “msg”)一般配合@Data注解 指定配置文件进行加载 @PropertySouce(“Classpath:/xxxxxxxx.properties”) ##1.7.3环境切换 1.通过—实现配置文件的分割 2.spring.profiles:prod定义环境名称 3.spring.profiles.active:prod制定默认环境 注意缩进 ##1.7.4 lombok环境插件配置 面试题:lombok可以哦自动的生成get/set等方法,但是使用lombok是需要安装插件!!! 问题:如果要在Linux系统运行Java项目,是否需要安装lombok插件??? 答不需要,lombok在程序编译器有效,当程序有.java文件编译为.class文件时,lombok插件开始工作,动态生成了get/set等方法,而Linux中运行的项目.jar包中包含了.class类型文件所以不需要安装lombok插件再次编译即可运行。